
Latest Post
Showing posts with label Nexus. Show all posts
Showing posts with label Nexus. Show all posts
Nexus Android 5.1.1 Battery Autonomy Fixes – Tricks And Tips
Written By Micah on Saturday, May 16, 2015 | 10:27 PM

Android 5.1.1 update is rolling out to Google’s Nexus tablets: 9, 7 and 10, and this version is supposed to fix many issues in Lollipop, but we don’t know yet if there are many users affected by the battery life problems which were inherited from the Android 5.1 update, which were reported even by the Nexus 6 users.
Because of the battery life problems, Google released Android 5.1.1, which is rolling out in phases, and will be available for four Nexus devices. Now it’s too early to tell if the users are content or if there are many experiencing the same battery drain. Only a few users complained about this problem, but we’re waiting for the rest of the Nexus owners to receive the update and to leave a feedback.
But, if you’re among the users with a bad Android 5.1.1 battery life, there are solutions for you. These methods work even if you’re running Android 5.0 Lollipop, 5.0.1, 5.0.2 or 5.1.
Identify the applications that drain your battery
When you feel that your device is dying faster than usual, you’re probably running a bunch of applications, most of them eating not only the battery, but the RAM as well. Most likely, you’ve installed graphical or data intense applications, without knowing that they can affect the battery life of your Nexus tablet or smartphone. To track the applications that drain your battery, you can go to the Battery section of Settings. When you find out which app is the battery killer, take the decision to uninstall it and install an alternative. But, if you’re not sure which software is eating your battery, restart your Nexus device and boot into Safe Mode. Turn on the screen, press and hold the Power button, press and hold the Power off option from the dialog box, then tap on OK from the next dialog. Safe Mode disables third-party applications and you can identify the applications that are guilty of killing the battery.
From time to time it’s recommendable to restart your Nexus device, because this way, your cache will be cleared and the battery life can go back to normal.
Clear the cache partition
Since we started talking about the cache partition, this is how you can clear it manually. You will need to press and hold Power + Volume Down buttons in the same time and wait until your screen has something else than Google on it. When you see the large arrow at the top of your screen, tap the Volume Down multiple times until you see Recovery in that arrow. Next, you will tap the Power button and an Android will appear with its chest open and having a red triangle and exclamation mark in the middle. Since you’re holding the Power button, you will have to tap the Volume Up one time, then release the Power button. Immediately, a list of items will appear at the top of the screen. You will tap the Volume Down until the item for wiping the cache partition will be highlighted, then to initiate the clearing process, tap the Power button. You will need to wait between 10 and 15 minutes for the process to complete, then you’ll restart the device.
Disable services that you’re not using
WiFi, Bluetooth, GPS or NFC must be turned off when you’re no longer using them. To do that, go to your Nexus’ quick settings menu or “kill” them from Settings.
- ordoh
Nexus 5 – Top Tricks And Tips For Enhancing The Battery Life
Written By Micah on Friday, May 8, 2015 | 10:36 PM

This article will teach you how to extend the battery life of your Nexus 5 mobile device. You can either try setting-up the Elemental X or scroll down even further and try the less complicated options.
But let’s begin by telling you about the Elemental X which is a good kernel alternative if users wish to change the stock Android. This ”kernel” we are referring to is the major link that helps communication run smoothly between the hardware and the software of the mobile device. So, in order to substitute the kernel, you will need a bootloader, root and also a personalized recovery installation.
How does this function?
You can either choose the preset alternative with default elements, or you can play experiment with the settings and change them by hand. The latter is a more avant-garde alterative and it is not an easy one to handle.
Quick tips on how to set-up Elemental X kernel :
- Go to ElementalX website on your Nexus 5 and set-up the kernel for the version of Android you are currently operating on.
- Switch off your device and begin the reboot process to the bootloader. You have to press&hold power as well as Volume Down. Hold these buttons until you notice the screen with a tiny robotic figure.
- By using the volume keys you must point up Recovery mode and then simply hold power to validate the operation.
- When you phone is in recovery mode, you must find the kernel you just downloaded. The whole procedure will depend upon the type of custom recovery you set-up on the device. You have the ClockworkMod recovery and the Team Win Recovery Project.
If you think this is too much or too complex, try the following gimmicks:
Switch off the luminosity
Of course the display of your phone is a pretty strong source of battery dissipation. So in order to fix this, go to Settings—Battery. If you have the tendency to believe that you can fix this by tailoring the optimal luminosity, you’re wrong. This is because the phone’s light sensor hasn’t got the capacity to readjust to this kind of fix-up. So instead, choose the lowest luminosity level, one you feel comfortable using.
Set “sleep mode” to 15 seconds
If you turn off your screen, you will significantly improve battery life. Normally, your phone’s display should shut down, but this is not working as it should. So rather then leaving the screen of the phone in” on” mode for a couple of minutes, make sure it stays ”awake” for just a few seconds. You can set it to 15 seconds, thus improving you battery’s life span.
Battery Saver: on
This is a great option for all you Nexus 5 users. This solution will immediately make major improvements. But it will cost you a few features, for instance the vibration mode of your phone will no longer function, or you won’t be able to synchronize your accounts. But if you come to think about it, it’s a sacrifice worth making in order to have a long-lasting mobile device.
Make sure your Nexus 5 is updated
When you upgrade, you automatically improve your battery. If you have the Android 5.0 Lollipop, you actually add 10% to you battery’s life span. Not bad at all. So make sure you constantly search for these updates. For this you must go to Settings—About phone—System Updates.
Bluetooth&Location Off
This is a pretty basic rule: Bluetooth must not be active, when it is not used. With the Location feature it can be pretty tricky though. This is because you use it for all kinds of services and even applications. But this should also be off for the sake of your battery.
- PAU
How to factory reset your Nexus 6
Written By Micah on Friday, February 13, 2015 | 5:21 PM
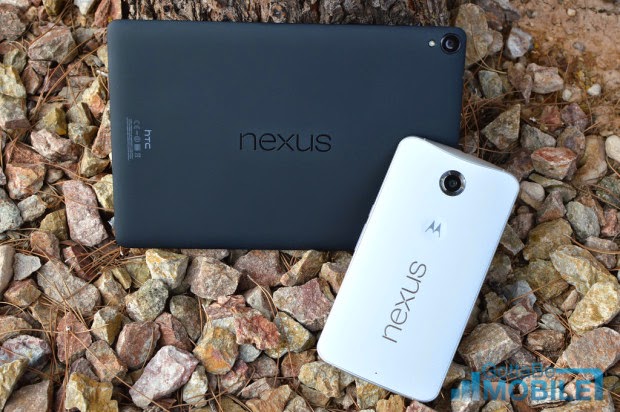
There are a few reasons why you might want to factory reset your Nexus 6, reverting it back to its out-of-box condition. Maybe you've decided to sell your device. Perhaps you want to eliminate any problematic apps and start again from scratch. Whatever the reason, it's easy to clear out your apps, photos and other content and start again from scratch.
Factory resetting your Nexus 6 is a simple enough process. And it's pretty similar on most phones running Android 5.0 Lollipop.
- Open the Settings app, either by finding it in the app drawer or tapping the cog icon in the notification shade.
- Scroll down to "Backup & reset"
- At the next screen, tap "Factory data reset"
- To confirm you choice, tap "reset phone."
The following screen will show you everything that'll be removed if you follow through on the reset process. As the name suggests, factory resetting the Nexus 6 will return it to its out-of-box condition, as it was when it left the factory.
- androidcentral
Nexus 6 – tips and tricks to enjoy Android 5.0 Lollipop
Written By Micah on Tuesday, January 13, 2015 | 8:31 PM

Fans are lucky enough to get hands on the latest Nexus 6. The first thing users will notice is that the device is huge and they might find it a bit hard to write on Facebook, send text messages or emails. Here are some tips and tricks about Nexus 6, which will help them get used to their phablet.
Resizing the UI
In case users have small hands, then they made a mistake buying this large phone. However, they can solve this issue by installing Swiftkey, which is a comfortable keyboard that can be positioned anywhere they want. Once users have installed the Swiftkey application, make it their default keyboard. In case users have problems with the entire UI and not only the keyboard, they can solve this issue by installing Xposed Framework. However, for this they will need to have root access on their device. In case users don’t have root access, there is nothing they can do about it.
Notifications
The Android 5.0 Lollipop comes with some awesome notifications settings. In case users don’t want to receive notifications from a specific application, they can just turn it off. To do this, go to Settings->Sound & Notifications and from there choose the application they want to get notification from and the ones that they want to block.
“Disable” the vibrations
Until now, when user were pushing the volume button several times, you could set thier phone in silent mode and this way user could also disable the vibrations. However, now even when the volume is down user can’t disable vibration. user can solve this issue by installing Silent Mode Lollipop application which will be able to block any sound without interrupting notifications.
Messenger application by Google
Google has released a “Messenger” application that it’s quite easy to use and comes with a great colorful design that users will enjoy. This application can be set as user default MMS/SMS application by going to Settings->More->Default SMS Application and choose Messenger.
Restricting access for Guests
Android 5.0 Lollipop allows users to make multiple accounts, like on their Windows PC. This way, they will be able to create.
Guest account that user’s friends/kids can use. Users will share their Nexus 6 with others without worrying that they will look into their personal stuff or change the device.
- customstoday
How to Enter Nexus 6 Recovery Mode
Written By Micah on Thursday, December 25, 2014 | 11:11 AM

The Stock and Custom Recovery Mode of your device will allow you to install new updates, custom ROMs, kernels on tons of other modifications that you can use to improve the overall performance of your smartphone. Check the info listed in this post in order to learn how to successfully learn how to boot your Nexus 6 in Recovery Mode.
Below you can find three different guides on how to boot Recovery Mode for your Nexus 6 smartphone. The first one teaches you how to boot the Stock / Custom Recovery Mode through Fastboot Mode, while the other ones will be destined to be used with ClockworkMod Recovery and Team Win Recovery Mode and two different Android applications.
How to Boot Recovery Mode for Nexus 6:
This guide works for both the Stock and Custom Recovery Mode versions, as it is done through the Fastboot / Bootloader Mode menu.
- Power off the Nexus 6.
- Press and hold Volume Down, Volume UP and Power buttons simultaneously.
- Release all buttons when the Fastboot Mode menu appears.
- Use the Volume buttons until the upper part of the screen displays the Recovery Mode text.
- Press Power to select Recovery Mode.– after that you will see an Android icon laid on its back.
- Press and hold Power button, then press once the Volume Up button.
The Recovery Mode will now show up and you’re free to test its options.
In case your smartphone packs a custom Recovery in it, then you will be able to boot Custom Recovery Mode through various applications such as ROM Manager or TWRP Manager applications. All these apps will work for rooted devices only.
The guides below are working straight from the home screen of your Nexus 6 device.
Boot Custom CWM Recovery Mode through ROM Manager:
This is a guide that works only if your Nexus 6 is rooted and it runs the CWM Recovery image.
- install the ROM Manager tool from here.
- launch the app.
- select ‘Reboot into recovery’.
- confirm.
- the Nexus 6 will boot CWM Recovery Mode menu in under a minute and you’re free to use its functions.
Boot Custom TWRP Recovery Mode through TWRP Manager:
This guide works only if the TWRP Recovery is installed on your Nexus 6.
- install the TWRP Manager app from here.
- launch the application on your device.
- press on Reboot Options.
- select Recovery Mode.
- confirm and wait until the TWRP Recovery Mode menu loads.
I hope that you’ve managed to learn how to boot the stock and custom Recovery Modes for your Nexus 6 smartphone.
10 Common Nexus Android 5.0.1 Problems & How to Fix Them
Written By Micah on Thursday, December 18, 2014 | 9:47 AM
Google’s new Android 5.0.1 Lollipop update is now available for the Nexus 4, Nexus 10, Nexus 7 2013, Nexus 6 and Nexus 9 and it will soon roll out to the Nexus 5. Google’s new Lollipop update doesn’t deliver any new features but it does feature fixes for Android 5.0 problems. As we’ve pointed out, it’s also causing some problems for select Nexus smartphone and tablet users. Here, we take a look at how to solve some of the common Nexus Android 5.0.1 Lollipop problems we’ve seen in the days after its release.
Earlier this month, Google released a new Nexus Android 5.0 Lollipop update into the Android Open Source Project. That update is Android 5.0.1 Lollipop, a follow up to the Android 5.0 Lollipop update that deployed in November and an update that is aimed at squashing some of the bugs that arrived on the original Android 5.0 Lollipop update.
Android 5.0.1 Lollipop is a small bug fix update that’s currently rolling out to owners of select Nexus devices including the Nexus 4, Nexus 7, Nexus 10, and Nexus 9. The update’s goal is to shore up the experiences on these devices and stabilize them as we head into the new year.
While Nexus users are pleased with Android 5.0’s new features and the bug fixes found on Android 5.0.1 Lollipop, others are peeved about their latest Android upgrade.

Nexus Android 5.0 Lollipop problems have been surfacing over the last couple of weeks and Nexus users are dealing with an assortment of issues ranging from battery drain to Wi-Fi problems to issues with corporate email. We’re now starting to hear about some of the issues plaguing the Android 5.0.1 Lollipop update as well. Many of these Android 5.0.1 Lollipop problems appear to be isolated though that doesn’t mean that other Nexus users won’t encounter various issues in the future.
With that in mind, we want to take a look at some of the Android 5.0.1 problems that have popped up and some of the problems that have the potential to pop up for Nexus 5, Nexus 4, Nexus 10, Nexus 7, Nexus 9, and Nexus 6 users in the future. With no Android 5.0.2 release in sight, Nexus users will likely need to rely on third-party fixes for Android 5.0.1 problems.
How to Fix Android 5.0.1 Installation Problems
One of the more annoying Android 5.0.1 Lollipop issues that’s popped up for Nexus users pertains to the installation process itself. Users are reporting that the update’s installation process stops mid-downloadand that the update cannot be installed. We’re also hearing about an issue where the Android 5.0.1 update pops up and then disappears. While we don’t have a cure all, we’ve discovered a few possible fixes for these problems.
A majority of the people experiencing installation issues seem to be people that have rooted, unlocked the bootloader and or installed a custom ROM. The first thing you’ll want to do is check in with your development community. In our experience, killing root, locking up the bootloader and returning to a stock version of the previous update will allow for the installation process to proceed. It’s a tedious process but it might be the only way to get the OTA going. There is another way though.

If you believe that your installation process has been corrupted in any way, try clearing your cache partition. To do this, you’ll need to follow these basic steps that outline the process:
- Press and hold Power and Volume Down buttons simultaneously until you see something other than Google on the screen.
- You should see a large arrow at the top of the screen.
- Tap Volume Down repeatedly until you see Recovery in the arrow. Then tap the Power button
- You should see an android on his back, chest open with a red triangle and exclamation mark.
- While holding Power button tap Volume Up once then release Power.
- You should now see a list of items at top of screen.
- Tap Volume Down until the item to erase or wipe the cache partition is highlighted. Then tap Power button to initiate.
- Status messages will appear at the bottom of the screen. Be patient – it can take 10-15 minutes to complete. When done restart the Nexus.
If returning to stock Android 4.4.4 KitKat and trying again doesn’t work. If clearing the cache partition doesn’t work. Well, then you probably want to factory reset the device. Just remember to back up all of your precious files before performing a wipe.
How to Fix Android 5.0.1 Battery Life Problems
Battery drain is one of the issues that always plagues Nexus users after Android updates. We haven’t seen a ton of complaints about Android 5.0.1 battery life problems but Android 5.0.1 is still limited to a few devices so we expect that to change in the days ahead. Fortunately, there are a few things Nexus users can do to try and eliminate abnormal battery drain if it emerges after the Android 5.0.1 upgrade.
Android updates aren’t supposed to cause battery drain issues and often times, the issues are caused by third-party applications that are behaving badly. So, first off, you’ll want to keep an eye on the apps and services taking up your precious battery life. You’ll be able to find that data in the Battery section of Settings. The Android operating system will breakdown the services sucking up your precious battery life.
Next, you’ll want to update your applications. Apps that haven’t been updated in awhile tend to cause problems. This will also help you identify some troublemakers. If you just updated your apps and you’ve just now run into issues, you’ll want to uninstall those applications to see if battery life improves after they’re gone.
You might also want to try rebooting your phone or tablet. It’s an extremely quick process but this will often return things to normal because the reboot will clear the cache and kill off services that might be eating away at your precious battery life.
If none of that works, you might want to think about factory resetting your device. You’ll want to backup your important files before doing this because it’s going to completely wipe the device clean. Nexus users with battery life issues can also take the less drastic approach and simply wait for Google to roll out a bug fix update. However, there’s no guarantee that the Android 5.0.2 release is close.
How to Fix Android 5.0.1 Wi-Fi Issues
Wi-Fi issues are causing problems for Android 5.0.1 users and many of them are looking for potential fixes. That’s not too surprising given that the problems range from slow connections to instability. Wi-Fi issues are common after Android update and through the years, we’ve been able to dig up a few potential fixes.
First, you’ll want to reboot the phone or tablet. You’ll also want to try rebooting your router if you haven’t unplugged it in awhile. We recommend unplugging the router for a good 30 seconds and then plugging it back in. You can do the same for your modem as well. If those simple fixes do not work, it’s time to head into the Nexus device’s settings.

There, you’ll want to force your device to forget your Wi-Fi network. Simply press down on the desired network and a white menu will pop up. At the top, you’ll see an option that says Forget network. Select that and then reenter your password to connect again. If that doesn’t work, try changing the frequency. To do that, click the vertical dots in the top right corner to bring up the Advanced menu. Go to Wi-Fi frequency band and play around with the settings. It should be set to Automatic by default.
If none of those fixes dislodge your Wi-Fi problems, we recommend updating your applications. If apps aren’t causing the problem then it’s probably worth trying another router to see if it’s your other hardware causing the issue. Older routers misbehave more than others. If none of that works, it’s worth performing a factory reset.
How to Fix Android 5.0.1 Bluetooth Problems
Bluetooth continues to be problematic for Nexus users after the arrival of Android 5.0.1. Bluetooth is always a pain point after major Android updates so the news doesn’t come as much of a surprise.

If you are dealing with Bluetooth issues with Android 5.0.1 on board, try switching the feature off and on. This is a simple fix but it’s worked for some Nexus users in the past. You’ll also want to try clearing the cache on Bluetooth Share. To do this, head into Settings -> Apps -> Scroll over to All -> Select Bluetooth Share -> Clear Cache. After doing this, power down your phone or tablet and boot back up.
You can also try to Clear Data from the same screen. This is going to cause your device to forget your Bluetooth devices so if you’re going to have problems setting the phone or tablet up with your favorite speaker or your car, you’ll need to be aware of that.
If none of the aforementioned fixes work, you’ll also want to try booting into Safe Mode. To do this, follow Google’s instructions:
- Ensure your device’s screen is on, then press & hold the Power button.
- Touch & hold the Power off option in the dialog box.
- Touch OK in the following dialog to start safe mode.
Booting into safe mode will disable third-party applications which will allow you to isolate them as potential troublemakers. It’s not a guaranteed fix but Safe Mode has worked for many Nexus users in the past.
How to Fix Android 5.0.1 Cellular Data Issues
We haven’t heard too many complaints about Android 5.0.1 cellular data issues but that doesn’t mean that users aren’t having problem nor does it mean that problems won’t pop up in the future. Cellular data has been causing problems for years and fortunately, that means that we’ve been able to gather up some potential fixes.
First, try flipping cellular data off. To do that go to Settings -> More -> Cellular networks. Turn it back on after 30 seconds or so and see if the connection is back. If it’s not, try rebooting the device. This has worked for us in the past when cellular data abruptly stops working. You can have it turned on, or off, prior to rebooting.

You might also want to try heading into your Access Point Name (APN) settings and updating them. Lollipop apparently did not properly update them for some users. To access your APN settings, Settings -> More -> Cellular networks -> Access Point Names. If you’re unsure about APN settings, contact your carrier before changing your settings.
We’ve also had success popping the phone or tablet into Airplane Mode. Switch on Airplane Mode and then switch it off. This has, in the past, restored cellular data on Nexus smartphones and tablets. It’s something to try if everything else fails.
How to Fix Android 5.0.1 Performance Problems
We’ve heard various complaints about performance after the Android 5.0 Lollipop and Android 5.0.1 Lollipop updates. There is one fix in particular that we think could have an enormous impact on your performance and that’s the fix we’ll outline here. Here’s how to potentially fix performance issues impacting your Nexus device.
- Press and hold Power and Volume Down buttons simultaneously until you see something other than Google on the screen.
- You should see a large arrow at the top of the screen.
- Tap Volume Down repeatedly until you see Recovery in the arrow. Then tap the Power button
- You should see an android on his back, chest open with a red triangle and exclamation mark.
- While holding Power button tap Volume Up once then release Power.
- You should now see a list of items at top of screen.
- Tap Volume Down until the item to erase or wipe the cache partition is highlighted. Then tap Power button to initiate.
- Status messages will appear at the bottom of the screen. Be patient – it can take 10-15 minutes to complete. When done restart the Nexus.
This fix should work across Nexus devices and it’s worth a try if you’re seeing crashes, lag or general instability after the Android 5.0.1 Lollipop update. If this fix doesn’t work, we suggest performing a factory reset, especially if your phone or tablet is an aging device like the Nexus 4. Factory resets are a pain but they work wonders for older devices.
How to Fix Android 5.0.1 App Issues
If you’re experiencing issues with applications after the Android 5.0.1 Lollipop update, there are a few things you can try.
First, try updating the problem app. If it comes with support for Android 5.0 Lollipop or its recently been updated with bug fixes and enhancements, there’s a good chance that the update will restore its performance to what it was prior to Android 5.0.1 Lollipop. You can also try reinstalling the application. This might seem simple but its worked in the past.
If you continue to run into issues with apps after installing Android 5.0 Lollipop, we highly recommend getting in touch with the developer. Most Android developers encourage feedback. And while they may not engage you immediately, there’s a good chance that your report will prompt a fix for the issue at some point down the road.
How to Fix Android 5.0.1 Video Playback Issues
Video playback issues on the Nexus 7 were extremely common after the initial Android 5.0 roll out. And while Android 5.0.1 seems to have quelled many of the complaints, there’s a good chance that these issues will strike some users again after Android 5.0.1. Video playback has been an issue for as long as we can remember.

For most users, the Nexus 7 Lollipop update is worth installing.
While there is no cure-all fix for these video playback issues, Nexus users will want to try clearing the cache on individual apps like YouTube. To do that, head into Settings -> Apps -> Select appropriate app -> Clear Cache.
That has worked for us in the past and there’s a good chance that it will work for you in lieu of a larger Android update from Google.
How to Fix Android 5.0.1 Boot Issues
We haven’t heard about widespread boot issues after the Android 5.0.1 update but boot issues are a common Android problem and we expect to see isolated issues pop up in the weeks ahead.
Some users say that they simply waited for awhile, some waited for a few hours, before the issue fixed itself. Others are saying that a factory reset did the trick. We highly recommend avoiding a factory reset if you can, you’ll lose all of your data if it’s not backed up, and simply wait it out. If you aren’t seeing any results, you may need to perform a soft reset or hard reset to get the device working again.
How to Fix Android 5.0.1 Problems If Nothing Else Works
If none of these fixes work, we suggest looking at a few different things. First, we recommend heading to Google’s Nexus Help Forum. There are a ton of knowledgeable people on Google’s forums that will gladly help if you run into problems. Sometimes, unorthodox fixes will work where common fixes fail. We also recommend taking a look at Android Central’s forums, one of our favorite Android-centric forums.

If you’re still unable to find a fix for your Android 5.0.1 problem, we suggest getting in touch with your service provider or with Google itself. Often times, the company will provide possible fixes when contacted directly. Depending on the severity of the problem, you might also be able to get the company to send you a new device. Warranties and customer service agents are going to be tricky to navigate but it’s worth a shot if you’re experiencing noticeable issues after Android 5.0.1 Lollipop.
How to Fix Nexus 9 Auto Rotation
The Nexus 9 brought Android 5.0 Lollipop to the market first, but for some users it also brought a problem with the Nexus 9 auto rotation feature. We’ll show users who have the Nexus 9 auto rotation problem how to fix it by turning off Google Now until Google issues a fix.
There are a few things that some users have tried in order to fix the problem with temporary success. Sometimes a reboot of the device fixed it for a little while. Others fixed it by turning auto rotation off and then back on again (open the notification area using the pull down settings. Swipe down from the top of the screen once to show notification are and then pull down again from the time/date bar of the notification area to show all the settings toggle buttons).
However, neither of these fix the issue permanently for any of the users reporting the problem.
We’ll show Nexus 9 owners how to fix the Nexus 9 auto rotation problem.

Two users in the XDA Developers Forum dedicated to the Nexus 9 discovered the two fixes we’ll explain. The first comes from forum member oldswe, who discovered a simple fix by turning off Google Now. Here’s how to do it.
Fix Nexus 9 Auto Rotation by Turning Off Google Now
Start by swiping towards the right to show the Google Now screen on the Nexus 9 home screen.

In the upper right corner, find the menu button that looks like three short horizontal lines next to the Google search box. Tap the button to show the menu bar that slides in from the left side of the screen.

At the top of the Setting screen there’s a Google Now toggle switch. Tap it to turn it off. A box pops up asking the user to confirm turning off Google Now. Tap on TURN OFF to confirm it.
Nexus 9 auto rotation still won’t work until the user restarts their Nexus 9 tablet. Press and hold the power button (top button on the right side when the camera is at the top of the screen in portrait mode). Tap on Power off to turn off the Nexus 9. After it shuts down, restart it by pressing and holding the power button for a few seconds. The tablet will restart after about 30 seconds and the auto rotation should work now.
Fix Nexus 9 Auto Rotation by Turning Off Location Services
Some users found that location services also interfered with the Nexus 9 auto rotation. If the Google Now fix above doesn’t fix the problem, try turning off the location feature. Here’s how.

Pull down from the top of the screen to show the Notification area. Now pull down again to show the Settings toggle buttons. It sits in the bottom left spot on the screen. Tap to turn it off and reboot the tablet using the steps provided above.
What Now?
Since turning off Google Now and/or Location services fixes the problem, this seems like a software problem instead of a hardware glitch. Some users report that they returned their Nexus 9 and received a replacement that didn’t suffer from the same problem.
Should users replace their tablet? If losing Location services or Google Now annoys a user, then she should replace it before the return period expires, 30 days for most. Since it seems like a software problem, then patience will likely result in a fix. Google will hopeful send out an update to their software that solves the problem. The recent Android 5.0.1 update didn’t fix it.
If enough people with the problem contact Google’s support team, the fix might come sooner than later. Find their phone number at the Nexus 9 devices support page. Also follow the discussion in the Google Help forums and XDA Developer’s forum.
13 Nexus 6 Tips & Tricks
Written By Micah on Saturday, December 6, 2014 | 1:01 PM

The Nexus 6 (our review) may have been announced a while ago, but that doesn’t mean it’s any easier to buy now. People are still waiting for theirs to arrive, and the Play Store isstruggling to keep them in stock. If you’re still waiting, or you finally got one, we have some must-know tips and tricks to help you get the most out of this giant Nexus.
Tap & Go

The first thing you have to do with a Nexus 6 is set it up. Lollipop introduced a new feature called “Tap & Go” which makes the process very easy. If your old device has NFC you can simply tap the devices back-to-back and all your Google account info, settings, data, widgets, wallpapers, and apps will be synced over to the Nexus 6.
Screen Pinning & Guest Mode

A smartphone is full of personal information and sensitive content. This can make it difficult to let people use your phone without your supervision. “Screen Pinning” is a new Lollipop feature that lets you lock your phone to one app.
You can “pin” a specific app so the user can’t do anything else. To enable this feature go to Settings > Security > Screen pinning. Then open the app you would like to pin, press the Overview (formerly multitasking) button, scroll up and tap the blue thumb tack icon in the bottom right corner of the most recent app. To unpin an app simply long-press the back and Overview buttons simultaneously.
Android tablets have had user accounts for a while, but the Nexus 6 is the first phone to get them. By default there is your account and a “Guest Mode.” In Guest Mode users are able to make phone calls and sign into apps as if it was their own device. Your user account is password protected from the guest. To switch to Guest Mode swipe down from the top of the screen with two fingers, tap your profile icon, and choose “Guest.”
Keyboard with Numbers Row

The Nexus 6’s giant display offers a ton of screen real estate, but the default Google Keyboard doesn’t make use of it. With a few tweaks in the settings you can add a number row (and more) to the Google Keyboard.
With the keyboard visible long-press the comma key and select “Google Keyboard Settings” from the pop-up. Next choose “Appearance & Layouts” and then “Custom input styles.” Tap the (+) button in the upper right and choose your preferred language. Now select “PC” from the layout drop-down. Now you just have to back out to the “Languages” options, un-toggle “Use system language” and select the PC layout.
Battery Saver

The Nexus 6 has a big 3220 mAh battery and Turbo Charging technology, but if you still need to squeeze out more juice you can use “Battery Saver.” When Battery Saver is enabled it reduces your device’s performance, turns off vibrations, and blocks most background data. It can be turned on manually or set to automatically kick in when your battery is at 15% or 5%. You’ll know it’s working when the status and nav bars turn orange. Go to Settings > Battery > tap the menu button.
Read More: 15 Tips & Tricks for Android Lollipop Users
Quickly Check Data Usage

Here’s a quick way to check how much data you’ve used. Simply tap on the data connection from Quick Settings and you can see how much data you’ve used in the last month. It also shows any warnings or limits you have set up, and tapping “More settings” takes you to the full Data Usage page in the Android Settings.
Set your account photo

You’ll notice that the Nexus 6 (and Lollipop in general) shows a tiny profile icon in the upper right of the lock screen and notification shade. By default it shows a generic silhouette, but you can change it to something more personal.
To do this swipe down from the top of the screen with two fingers. Tap on the little profile icon and you’ll see the users on your device. With your account selected tap “More Settings.” On the next screen tap on you account and a pop-up will allow you to change your name and photo. We’re not sure why it doesn’t automatically use your Google account photo, but at least it’s easy to fix.
Control Notifications

The Nexus 6 and Lollipop give users control over notifications like never before. Every app installed on your device can be configured to send notifications only when you want to see them. You can also put the phone is special modes to restrict notifications. Each app can be put into three notification categories:
Block – Never show notifications from the app.
Priority – Show notifications at the top of the list and let them through when in Priority Mode.
Sensitive – Content is not displayed in the lock screen notification
To adjust the notification options for apps go to Settings > Sound & notification > App notifications. To switch your phone into Priority Mode or Do Not Disturb Mode press the volume keys and use the options in the pop-up.
Smart Lock

It’s a good idea to have a layer of security on your device. The only problem with using a password or pattern lock is that it ends up slowing you down way more than anyone else. The Nexus 6 has a feature called “Smart Lock” that lets you tell your phone when it’s safe. Right now there are three ways to make your phone trust you.
Trusted devices – Any Bluetooth or NFC device can be added here. When those devices are connected your lock screen security is disabled.
Trusted face – This is Google’s much better implementation of “Face Unlock.” After you scan your face it will look for you every time you unlock your device. If it recognizes you the lock screen security will be disabled.
Trusted places – In this option you’ll see any locations you’ve added to your Google account. You can toggle those on or add a new place manually. When you are in those locations the lock screen security will be disabled.
With these three options you can make it so you don’t have to constantly enter passwords or patterns, but if your device is stolen or left behind it will know to lock others out. These options can be accessed in Settings > Security > Smart Lock.
Lock Screen Shortcuts

The lock screen has a few shortcuts that can get you into certain apps quickly. Swiping up on the lock screen unlocks the device, but swiping right launches the camera (or apps like Snapchat), and swiping left goes straight to the phone. These are two things you don’t want to be fumbling around to find.
Shoot 4K Video

Did you know you are now the proud owner of a 4K camera? Google hasn’t advertised it a lot, but the Nexus 6 can indeed shoot 4K video. To enable 4K video open the default Google Camera app and swipe from the left side to open the menu. Tap the settings icon in the lower right of the view finder. On the next page tap “Resolution & quality.” Here you can adjust a few things, but we’re interested in “Back camera video.” Switch that to “UHD 4K.” Now go shoot in 4K!
Enable High Quality Audio

If you watch a lot of stuff with the Google Play Movies & TV app there is perhaps no better device to own than the Nexus 6. It has a huge beautiful display and awesome dual front-facing speakers. There is even a way to turn on surround sound audio.
In the Play Movies & TV app swipe from the left and select “Settings.” Scroll down and make sure “Enable surround sound” is checked. You can then play a demo to listen to the surround sound in action. It sounds great with the speakers, but if you have headphones available you’re in for a real treat.
“Ok Google” When Device is Locked

The Nexus 6 is one of few devices that can hear the “Ok Google” command while locked. With this feature you can ask “how many ounces in a pound” without touching your phone with dirty hands, or start playing music from across the room.
Swipe up from the Home button to open Google Now. Swipe from the left and tap “Settings.” Tap on “Voice” and then “Ok Google’ Detection.” Before you can turn on “Always on” and “When locked” you’ll need to train the voice model. It will ask you to say “Ok Google” three times and then you can toggle the switches.
Turn Off “Merged Tabs”

Chrome on the Nexus 6 comes with a feature that merges tabs and apps in Overview (formerly multitasking). Instead of seeing your tabs in Chrome they get put into the same place as recent apps. This feature sounds like a good idea in theory, but in practice it’s annoying.
The problem is you end up with a million tabs open and no easy way to manage them. Overview remembers dozens and dozens of recent apps, so if you opened a tab once and never looked at it again it’s lost way back in the list. To turn of merged tabs go into the Chrome settings and change “Merge tabs and apps” off.


